


How to Set Up Your First Crypto Wallet: The Ultimate MetaMask Beginner's Guide
Master crypto basics! Learn how to safely set up your MetaMask wallet step-by-step, secure your assets, and start exploring DeFi, NFTs & Web3 gaming.
Setting Up Your First Crypto Wallet
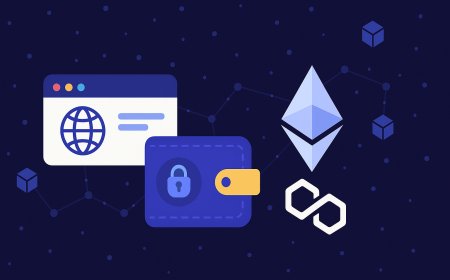
Welcome to the decentralized world of Web3! Whether you're here for cryptocurrencies, NFTs, decentralized finance (DeFi), or blockchain gaming, your journey begins with one crucial step: setting up a crypto wallet. Think of it as your secure digital bank account and ID rolled into one, allowing you to store assets and interact with decentralized applications (dApps).
Among the many options, MetaMask stands out as the most popular and versatile browser extension wallet. It's user-friendly, supports countless tokens, and is your essential bridge to the Ethereum blockchain and many other compatible networks.
This ultimate guide will walk you through setting up your very first MetaMask wallet, securing your assets, and understanding its basic functions. Let's dive in!
What Exactly is a Crypto Wallet?
Before we set up, let's quickly clarify. A crypto wallet isn't like a physical wallet holding cash. Instead, it holds the private keys (a secret code) that prove your ownership of cryptocurrency and NFTs on a blockchain.
- Public Key (Your Wallet Address): Like your bank account number. You can share this for people to send you crypto.
- Private Key (Your Secret Code): Like your bank account password. This must NEVER be shared.
- Seed Phrase (Recovery Phrase): A series of 12 or 24 words that acts as a master key to ALL your crypto assets on that wallet. Lose this, and you lose everything. Share this, and someone else gains full control.
Why Choose MetaMask for Your First Wallet?
MetaMask is widely favored for several reasons:
- Browser Extension: Easily integrates with Chrome, Firefox, Brave, Edge, and Opera.
- User-Friendly Interface: Designed for relatively easy navigation, even for beginners.
- DApp Compatibility: Connects seamlessly with thousands of decentralized applications for DeFi, NFTs, and GameFi.
- Multi-Chain Support: Primarily for Ethereum, but easily configurable for other EVM-compatible networks like Polygon, Binance Smart Chain (BSC), Avalanche, and more.
- Strong Community Support: Large user base means plenty of resources and troubleshooting help.
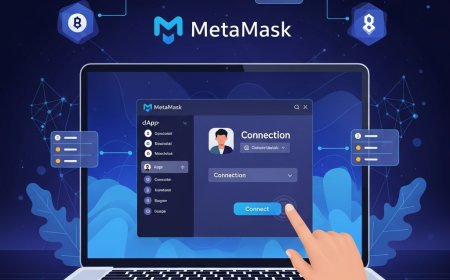
Step-by-Step Guide: Setting Up Your MetaMask Wallet
Follow these steps carefully to create your secure MetaMask wallet.
(Note to daily4mative: In your actual article, each step below should include a clear screenshot/image to make it incredibly easy to follow.)
Step 1: Download the Official MetaMask Extension
- Go to the Official Website: Open your preferred web browser (Chrome, Firefox, Brave, Edge, or Opera) and navigate to the official MetaMask website:
metamask.io.- CRITICAL WARNING: Always ensure you are on the official site. There are many phishing sites designed to steal your crypto. Bookmark the official link!
- Click "Download for [Your Browser]": You'll see a prominent download button. Click it.
- Add to Browser: On the next page, click "Add to [Your Browser]" (e.g., "Add to Chrome") and then confirm by clicking "Add Extension" in the pop-up.
- Pin MetaMask to Your Toolbar: Once installed, a small fox icon will appear in your browser's toolbar. Click the puzzle-piece icon (Extensions) and "pin" MetaMask for easy access.
Step 2: Create a New Wallet
- Open MetaMask: Click the MetaMask fox icon in your browser toolbar.
- Welcome Screen: You'll see a welcome message. Click "Get Started."
- "New Wallet" Option: On the next screen, click "Create a new wallet." (If you already have a seed phrase, you'd click "Import wallet" here).
- Help Improve MetaMask (Optional): You'll be asked if you'd like to help improve MetaMask by sharing anonymous data. You can choose "I agree" or "No Thanks" based on your preference.
- Create a Strong Password: Enter a strong, unique password for your MetaMask wallet. This password protects your wallet on your device and needs to be entered every time you want to unlock MetaMask in your browser. It does NOT recover your wallet if you lose your seed phrase.
- Recommendation: Use a mix of uppercase and lowercase letters, numbers, and symbols. Make it at least 12 characters long.
- Confirm Password & Agree: Re-enter your password, check the "I understand..." box, and click "Create a new wallet."
Step 3: Secure Your Secret Recovery Phrase (Seed Phrase) - THIS IS THE MOST IMPORTANT STEP!
- Watch the Video (Optional but Recommended): MetaMask provides a short video explaining the importance of your Secret Recovery Phrase. Watch it.
- Reveal Secret Recovery Phrase: Click the padlock icon to reveal your 12-word Secret Recovery Phrase.
- WRITE IT DOWN (Crucially Important!): Get a pen and paper. Do NOT type this into your computer, take a screenshot, or store it digitally (e.g., in Google Docs, email, or cloud storage). Write down the 12 words in the exact order they appear, clearly and legibly, on multiple pieces of paper.
- Example:
apple banana cherry dog elephant fish grape hat ice jug kite lemon - Why? This phrase is the ultimate backup. If your computer crashes, your browser is corrupted, or you need to access your wallet from a different device, this phrase is the only way to restore it and access your funds. Anyone with this phrase has full control over your wallet.
- Example:
- Store It Safely: Store these pieces of paper in separate, secure, offline locations (e.g., a fireproof safe, a secure deposit box, a hidden spot in your home). Think about places a thief wouldn't find or a disaster wouldn't destroy.
- Confirm Your Seed Phrase: MetaMask will then ask you to re-enter a few words from your phrase to confirm you've written it down correctly. This ensures you haven't made a mistake.
- "Got It!" / "Done": Once confirmed, you'll see a confirmation message. Click "Done" or "Got It."
Step 4: Explore Your MetaMask Wallet
Congratulations! You've successfully created your MetaMask wallet. You'll now see your main wallet interface.
- Account Name: "Account 1" (you can click the three dots next to it to rename).
- Wallet Address: Starts with
0x...(click it to copy). This is what you share to receive crypto. - Network: By default, it's set to "Ethereum Mainnet."
- Assets: This tab shows your cryptocurrency balances (initially 0 ETH).
- Activity: This tab shows your transaction history.
Basic Functions: Receiving & Sending Crypto (on Ethereum Mainnet)
How to Receive Crypto (ETH or ERC-20 Tokens):
- Copy Your Wallet Address: On your MetaMask home screen, click your public address (the one starting with
0x...) directly below "Account 1" to copy it to your clipboard. - Provide Address to Sender: Paste this address into the sending platform (e.g., a crypto exchange like Binance or Coinbase, or another person's wallet) when prompted for a "recipient address."
- Confirm Network: Ensure the sender is sending on the Ethereum Mainnet for Ethereum (ETH) or ERC-20 tokens. Sending assets on the wrong network to an address that doesn't support it can result in permanent loss.
- Check Balance: Once the transaction is confirmed on the blockchain, your balance will update in MetaMask.
How to Send Crypto (ETH or ERC-20 Tokens):
- Click "Send": On your MetaMask home screen, click the "Send" button.
- Enter Recipient Address: Paste the recipient's MetaMask or Ethereum-compatible wallet address into the "To" field. Double-check this address! Sending to the wrong address means lost funds.
- Enter Amount: Input the amount of ETH or the specific ERC-20 token you want to send.
- Review Gas Fees: MetaMask will estimate "gas fees" (network transaction fees, paid in ETH). These vary based on network congestion.
- Confirm Transaction: Review all details carefully. If everything looks correct, click "Confirm."
- Monitor Status: Your transaction will appear in the "Activity" tab. You can click on it to view its status on Etherscan (the Ethereum blockchain explorer).
Important Security Tips for Your MetaMask Wallet:
- NEVER Share Your Secret Recovery Phrase: This is paramount. Anyone with your 12 words owns your crypto.
- Be Wary of Phishing: Only download MetaMask from
metamask.io. Double-check URLs before connecting your wallet to any website. - Strong, Unique Passwords: Use a unique, complex password for your MetaMask browser lock, and ideally, use a password manager.
- Hardware Wallet Integration: For larger amounts of crypto, consider connecting a hardware wallet (like Ledger or Trezor) to MetaMask. This adds an extra layer of security.
- Revoke Permissions: Regularly check and revoke permissions you've granted to dApps that you no longer use via sites like
revoke.cashoretherscan.io/tokenapprovalchecker. This prevents malicious dApps from accessing your funds. - Be Skeptical: If something sounds too good to be true, it probably is. Be wary of unsolicited offers, free crypto giveaways, or direct messages asking for your seed phrase.
- Educate Yourself Continuously: The Web3 space evolves rapidly. Stay informed about new security threats and best practices.
Conclusion: You're Ready to Explore Web3!
Congratulations! You've successfully set up your MetaMask wallet – your essential first step into the exciting world of Web3. With your wallet secured, you're now equipped to explore decentralized applications, collect NFTs, engage in DeFi, and dive into blockchain gaming.
Remember, security is an ongoing process. Always prioritize protecting your Secret Recovery Phrase and stay vigilant against scams.
Now that your wallet is ready, what's next? Explore our [Link to Crypto Basics Category]Crypto Basics[/Link] or [Link to Blockchain Games Category]Blockchain Games[/Link] sections to continue your Web3 journey!
What's Your Reaction?
 Like
0
Like
0
 Dislike
0
Dislike
0
 Love
0
Love
0
 Funny
0
Funny
0
 Angry
0
Angry
0
 Sad
0
Sad
0
 Wow
0
Wow
0